Weird & Wonderful.
The next unit of work we did was a topic called 'Weird and Wonderful'. The over view we got given was 'artist research', contact sheets, Photoshop development, final development stages, final piece and evaluation. The starting points we could choose from were:
I didn't really choose one of the bullet points, I just tried to mix my project up a bit using different camera/photography techniques.
Cloning was one of the topics i found quite a challenge.
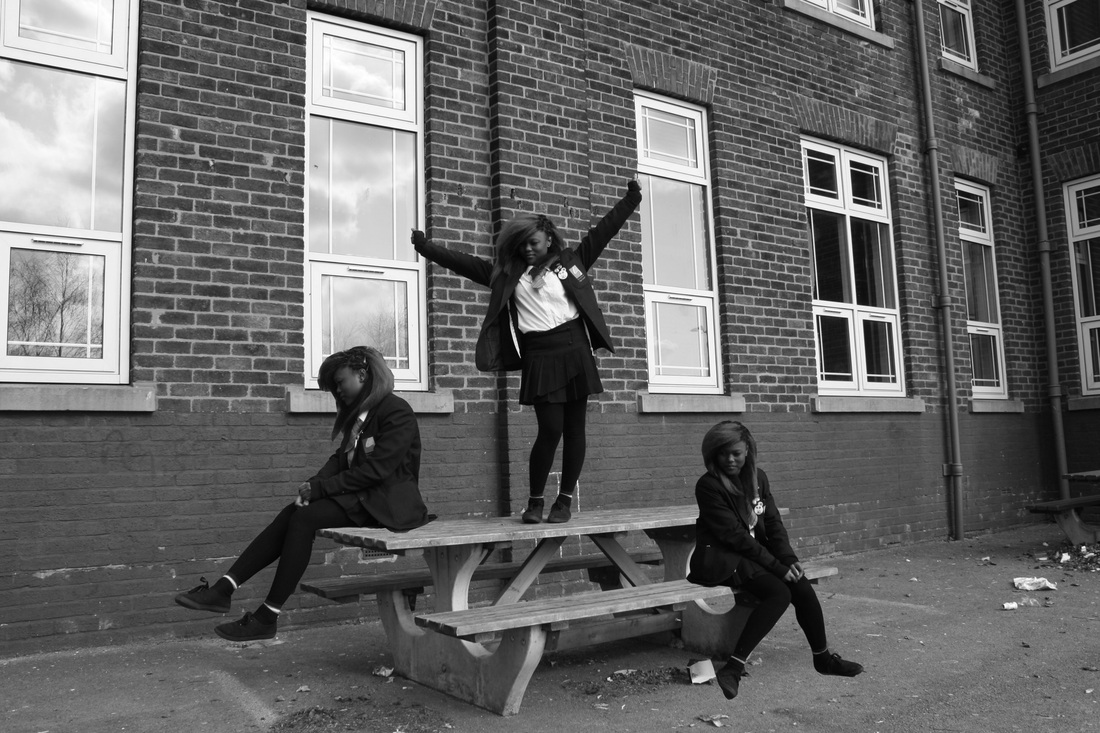
The image below took a lot of preparation and planning and after taking the pictures loads of hard work, however I do think it paid off in the final image. This is the my only attempt and only image of cloning. I have used Photoshop and Picmonkey combined to assemble the final image.
How did I Photoshop?
First of all, before I used Photoshop I had to take the pictures. Using a tripod is compulsory for when cloning, this is because you have to take 3 (or more) pictures of the object/person you are cloning. Whilst the object or person is moving around the background needs to stay the exact same the whole way through or the picture wont work. So I asked my friend to help me. She moved around into three different places, and I took the pictures separately. I then chose one picture, which was going to be my background. Next I opened up the other two images on Photoshop, and used the 'quick selection tool' (below) to cut out the background so I was just left with two separate pictures of my friend in different positions. I then transferred them onto the background image and positioned them to complete my cloning position. I then merged the layers to make it just one picture. The final thing I did to complete my picture was edit the final piece on picmonkey to make it black and white.
- Dreams or nightmares.
- Surrealism.
- Magic
- Fairy tales.
- Superhero Powers.
I didn't really choose one of the bullet points, I just tried to mix my project up a bit using different camera/photography techniques.
Cloning was one of the topics i found quite a challenge.
The image below took a lot of preparation and planning and after taking the pictures loads of hard work, however I do think it paid off in the final image. This is the my only attempt and only image of cloning. I have used Photoshop and Picmonkey combined to assemble the final image.
How did I Photoshop?
First of all, before I used Photoshop I had to take the pictures. Using a tripod is compulsory for when cloning, this is because you have to take 3 (or more) pictures of the object/person you are cloning. Whilst the object or person is moving around the background needs to stay the exact same the whole way through or the picture wont work. So I asked my friend to help me. She moved around into three different places, and I took the pictures separately. I then chose one picture, which was going to be my background. Next I opened up the other two images on Photoshop, and used the 'quick selection tool' (below) to cut out the background so I was just left with two separate pictures of my friend in different positions. I then transferred them onto the background image and positioned them to complete my cloning position. I then merged the layers to make it just one picture. The final thing I did to complete my picture was edit the final piece on picmonkey to make it black and white.
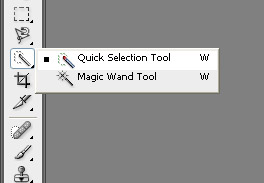
Quick Selection Tool.
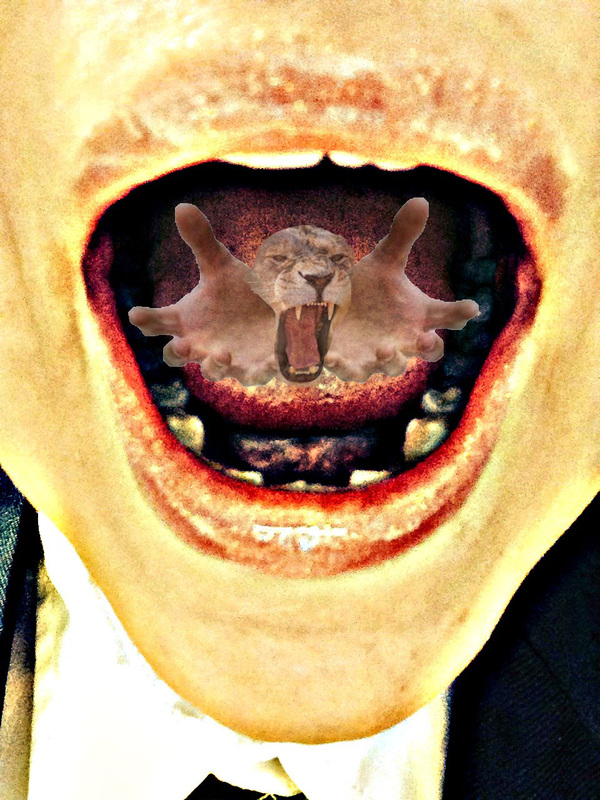
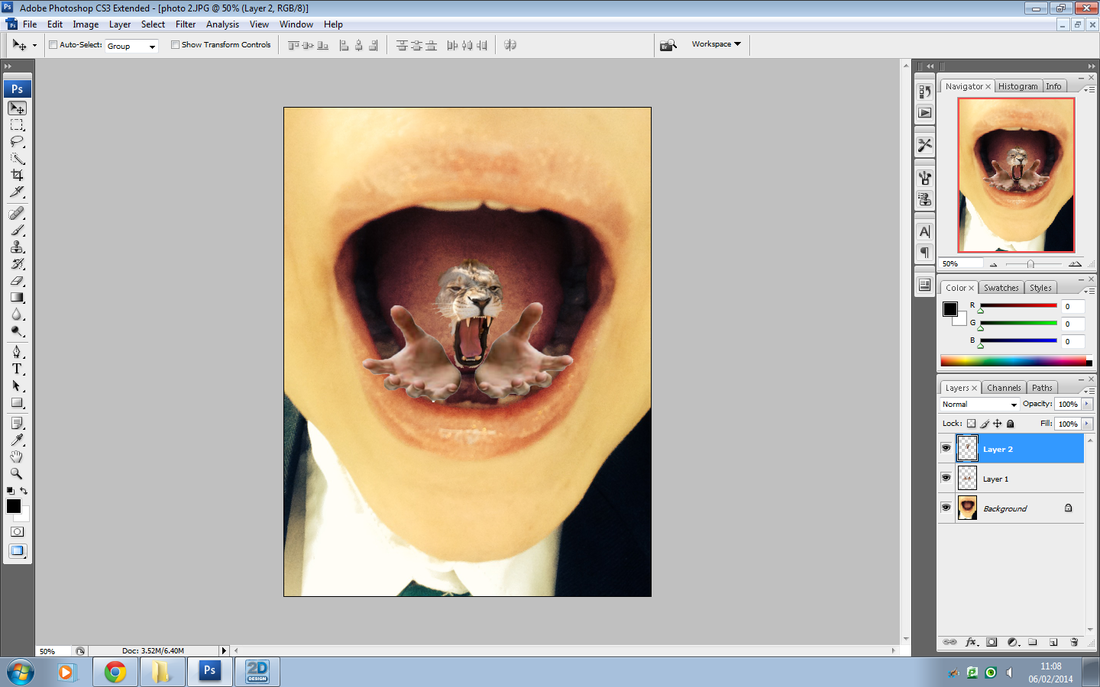
My Second Image.
First of all, I am going to tell you how I did my picture, before showing you the final piece. The first thing I did, was collect together all the photo's I was going to use in my picture, in this case being images. (The one on the middle is a picture I had taken myself).
First of all, I am going to tell you how I did my picture, before showing you the final piece. The first thing I did, was collect together all the photo's I was going to use in my picture, in this case being images. (The one on the middle is a picture I had taken myself).
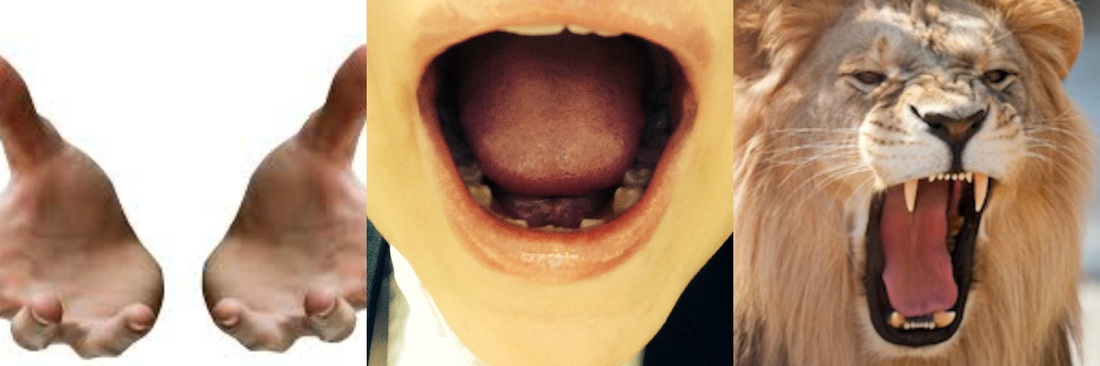
First I put each of the pictures on separate layers on photo shop, I then cropped them down to the parts of the pictures that I wanted to use, using the same tool I used in cloning the 'quick selection tool'. I then transferred each of them onto the picture of the mouth (which I had decided would be my background image, because that was my locked background layer. Once I had them all in position I changed the opacity of the hands and the lion so they were slightly harder to see, however you could still see them (for an effect and to make it look more realistic and less edited). Finally, I merged the layers. Creating one final picture. After all of that was finished, I decided to edit it to get the effect I wanted. So I edited it on a website called Picmonkey (link you will find below). This creating my final image.
I also did all of the above with another photograph, which I will show below.
(Below the two final pictures are screenshots of what I did on Photoshop step by step)
I also did all of the above with another photograph, which I will show below.
(Below the two final pictures are screenshots of what I did on Photoshop step by step)
My Picture.
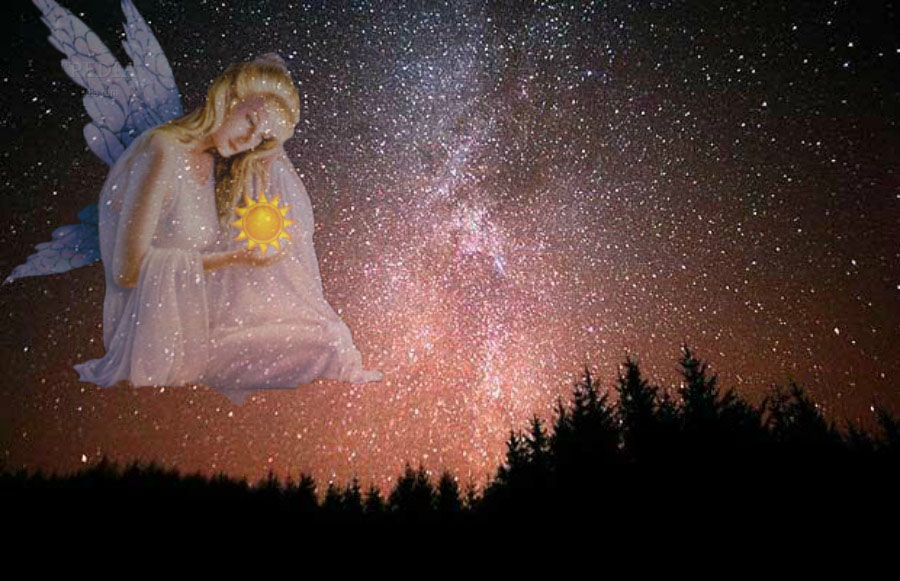
The below picture although having no relevance to the unit I was doing at the time was to familiarize myself with using Photoshop. It was to practice using the different techniques on Photoshop. Also, to widen my skills on Photoshop as there are loads of different techniques to learn and pick up on.
My second picture.
How I Used Photoshop - Step By Step In Pictures.
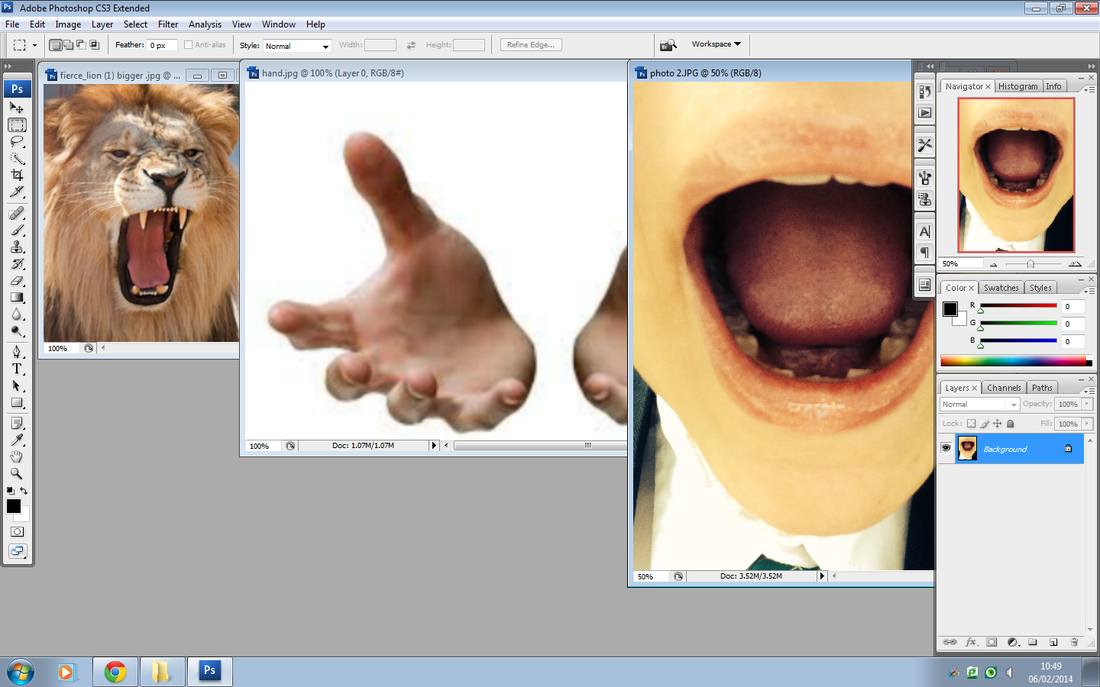
Step 1 - Opening the pictures onto Photoshop
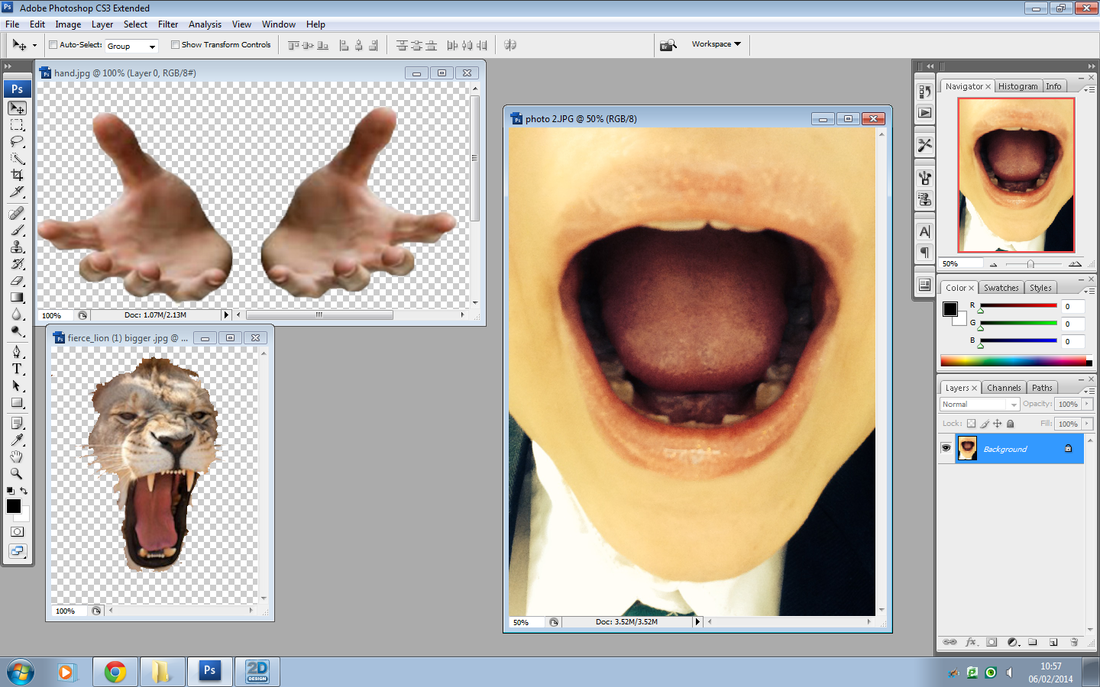
Step 2 - Cutting the pictures down to the parts/sizes you want
Step 3 - Copy & Paste the Images
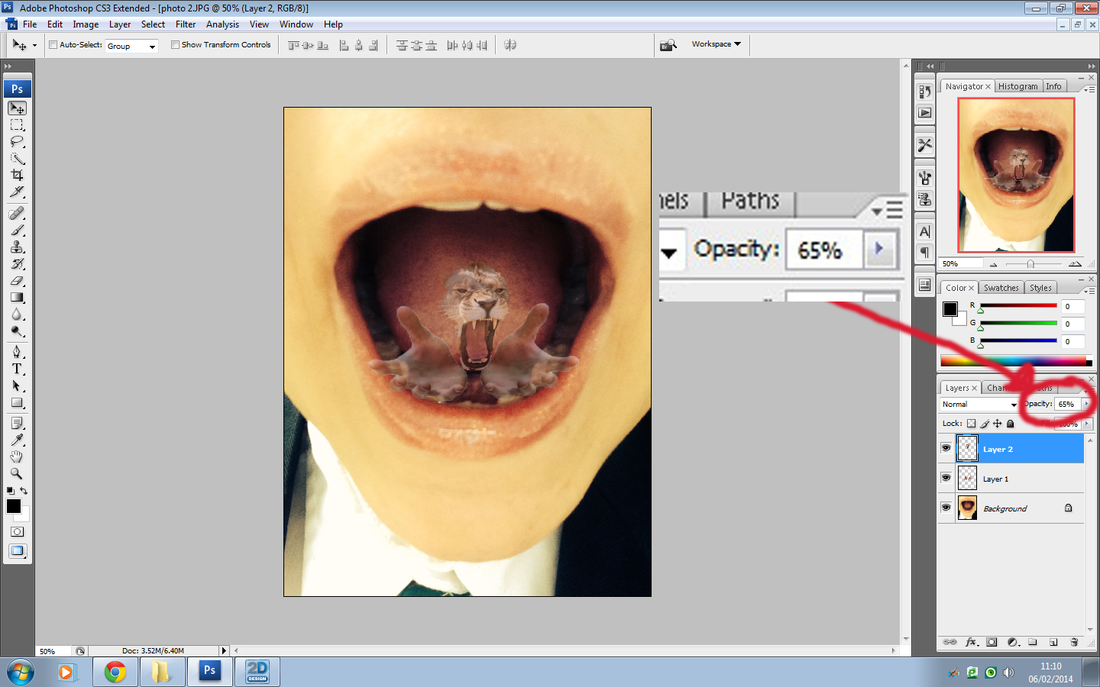
Step 4 - Opacity
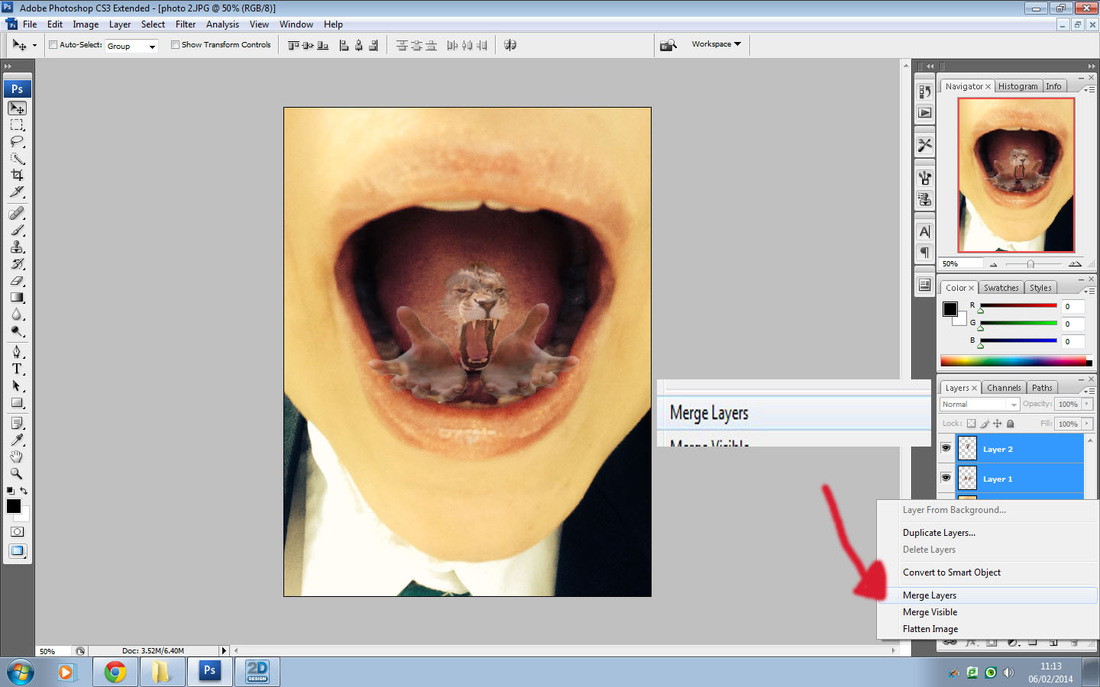
Step 5 - Merge Layers
Photographer Research:
Anne Geddes
A weird and wonderful photographer who I particularly like is Anne Geddes. Whilst some people may argue that she is not a weird and wonderful photographer, I believe the work she does is not only weird (different), but also wonderful too.
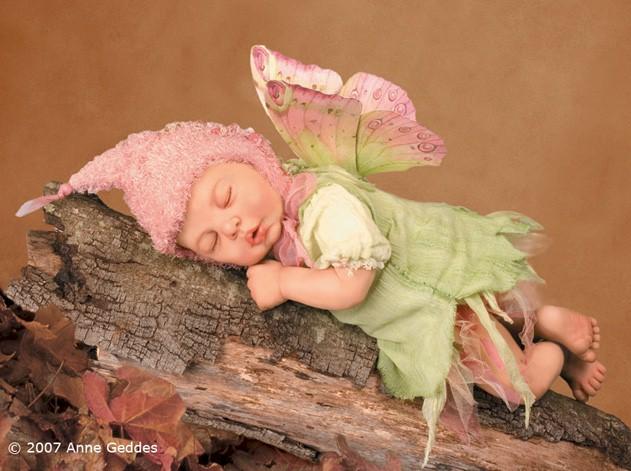
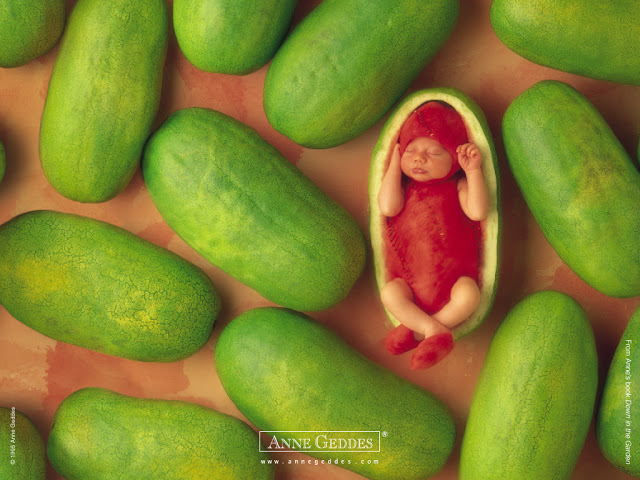
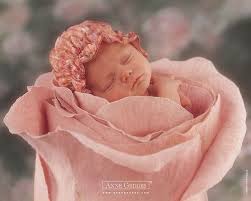
What she specializes in, is baby photography, but not just your everyday normal baby photography. No, Anne Geddes makes a little scene with the baby in, in the most remarkable ways. For example this is my favourite picture:
It is my favourite because, I love how there is a little scene set out. That the fairy is in fact the baby, and she is lay on top of a part of a tree, and how the focus point is the little scene in the middle and the background has no focus on it whatsoever. Also, although there is a lot going on in the picture. You are still focused on the one baby and the whole picture doesn't take your mind of it too much. I also like how the exposure is just right, not to light and not to dark, because often when taking photographs of people, photographers don't always get it spot on, its either a little bit to dull, or a little bit too light.
Unfortunately I couldn't do any pictures inspired by this photographer, because we didn't have any babies, however I could follow in her footsteps of the camera techniques used, for example the; viewpoints, aperture and depth of field, to make sure my pictures turned out as well as hers.
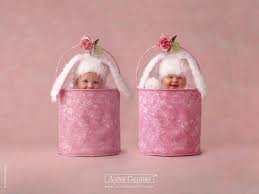
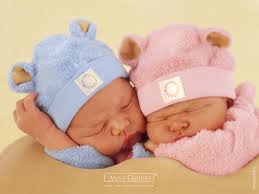
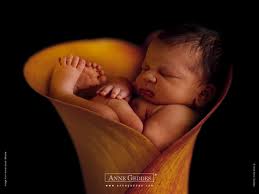
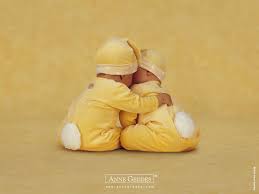
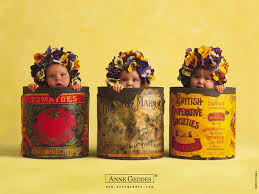
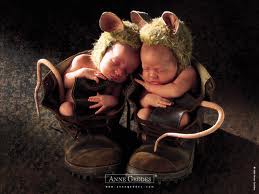
Here are a few more of Anne Geddes pictures, you can also view her blog, or her website to view more (link above).


Bill Brandt
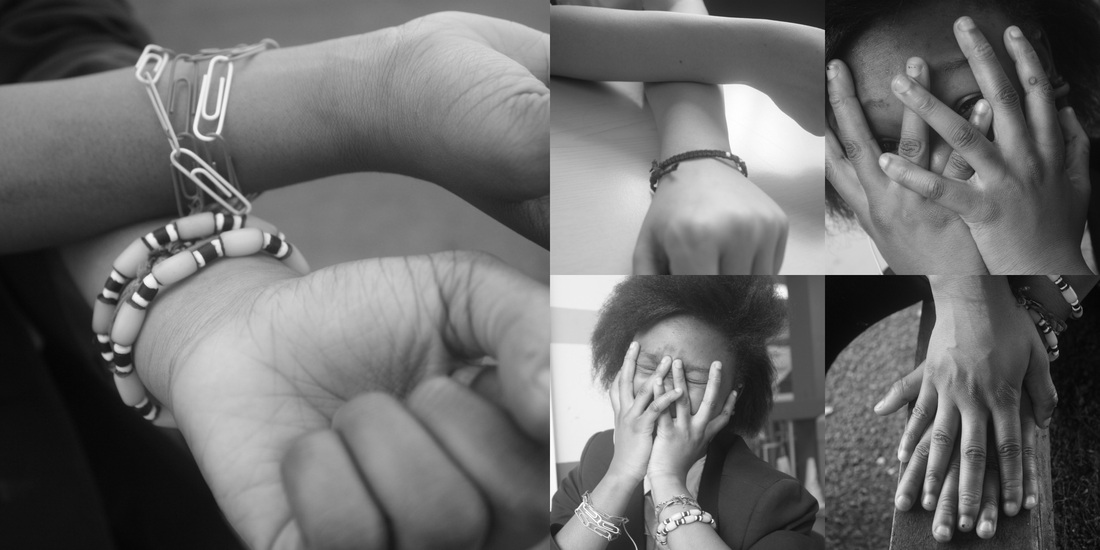
Bill Brandt was born in 1904, and was a German-British photographer. His photographs are all in black and white. This is the particular reason I like them. Not only that, but he focuses on parts of the body such as; the hand, feet and face etc. I tried doing some pictures in the style of this photographer, however I wouldn't brand them as my best photos although in the end they did turn out quite nice.
The three pictures below are my favorites by Bill Brandt, the reason being are they are in black and white and focus on parts of the body. Bill Brandts photographs are simple yet different which is why I had chosen him as one of the photographers to research.
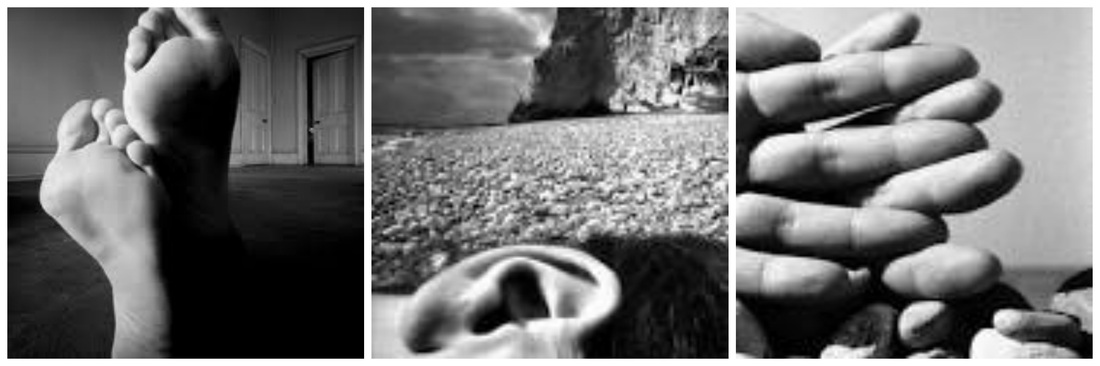
Now you can see what I mean by black and white, and bodily features.
After researching Bill Brandt, I wanted to try it myself, because black and white photographs are a great passion of mine. The below picture I feel is my best photo in the style of Bill Brandt, because the exposure is just right for a black and white photo and not to light not to dark, also I decided for this picture to have a small depth of fiel so only our hands would be in focus. I did this because I thought the overall look of it would be better than the entire picture being in focus. Also a large amount of Bill Brandt's photos have a small depth of field and/or just the bodily part in focus.
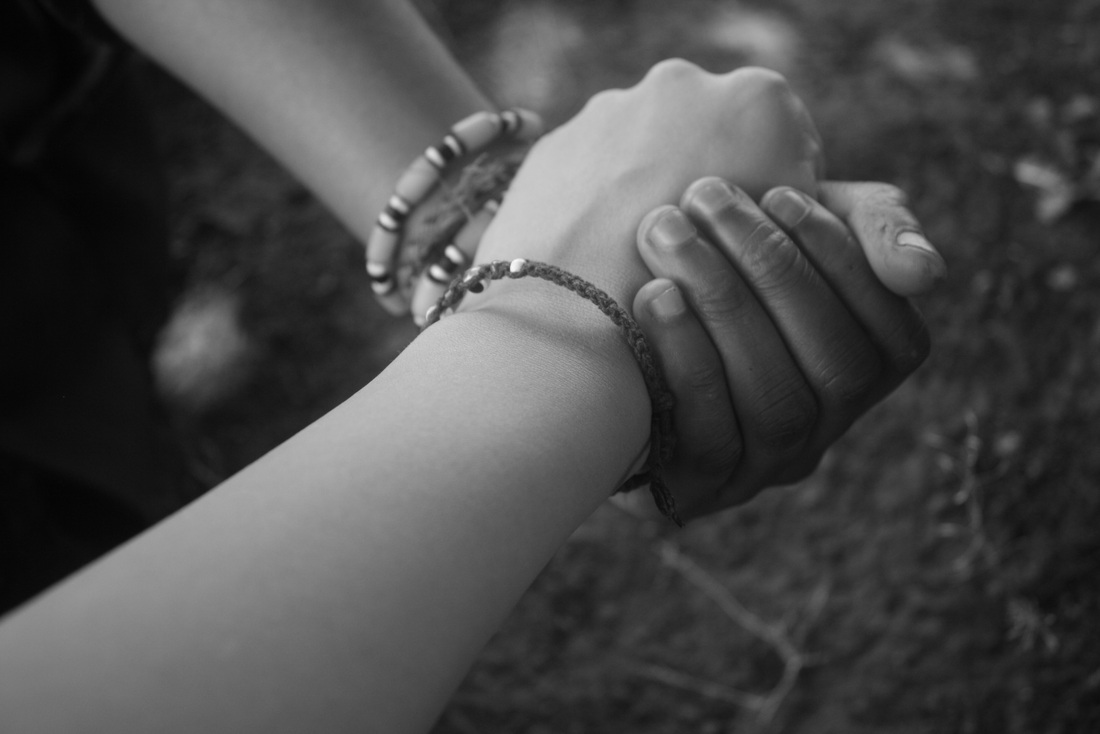
This is actually mine and my friends hands.
I decided to put the focus points on the arms, and hands and have the background out of focus.
The pictures below are the other pictures I have taken in the style of Bill Brandt, although the above one is definitely my best picture.
The pictures below are the other pictures I have taken in the style of Bill Brandt, although the above one is definitely my best picture.